Leg Day

Finally took some time to make some headway again with R2. I took the legs partially apart to make sure I knew what was glued up, and what isn’t. The big thing was attaching the extra plates and ankle outer attached. On several occasions the ankle outers and the plate they’re attached to, have fallen off the cabinet they’re stored on top of, and hit me in the head. They’re no longer loose, so that won’t be a problem anymore.

At the same time, I also glued in some of the pins used for alignment. They fit snug enough that they’re an option for keeping the legs together as well. Most of the leg layers are glued together, so they’re really only supporting two parts being held together. At some point I intend to affix those parts together, but I think I want to either put some sort of conduit in the legs, or at least run wires through the legs so I’m not having to fish wire through there later.

2020-08-29 22.04.48.jpg

2020-08-29 22.04.53


3D Printed Parts – So Far…

To show off what I have so far, I took a picture.

The shoulder hydraulics are PETG.  They were printed differently.  One was an early draft, printed with a .5mm nozzle.  The other was like a 3rd draft, printed with a raft, and a .2mm nozzle.  The one with the better knurled area is the one printed with the finer nozzle.

The shoulder hub is a first draft.  Ian had printed me the “standard” 3 piece model from the Astromech.net 3d file vault.  Ian wasn’t satisfied with quality of the model.  It had lots of flat spots on it and wasn’t a tight fit.  He remodeled into a single piece, made of more efficient parts instead of having the “low polygon” look of the original.  The remake was made from circles and cones.  It was printed with PLA instead of PETG as we realize these will be “protected” and don’t need to be super durable.  2018-07-15 08.18.47

Legs Progress – Boosters

2018-05-25 07.39.40Booster covers arrived.  They’re quite beefy; much more so than I expected.  I’m impressed that the 3D printer also sent the failed attempts as well.  This will give me some pieces to test with.

2018-05-25 07.39.28I had them printed with 20% infill, and 5 layers of wall at 200 microns.  They’re printed in PETG, and the walls ended up about 2mm thick.  They’re not super light, but they’re not overly heavy either; I’ve gotta believe that they’re lighter than they’d be if they were aluminum, and with 2mm thick walls, they may almost be as strong (ok, that’s an exaggeration).

They have more “grain” to them than I’m thrilled with, but it’s something I can work with.  I’m thinking instead of sanding them down, I might use some glazing putty on them to fill in, instead of sanding off.  Straight up Bondo might be the answer as well.  I found out my boss has some expertise with fiberglass, so I’m going to ask him for some advice on this.  I may leave some of this texture on there as well, because I kind of like it.  We’ll see.  Everything on the “real” R2 looks nice and smooth, so it might not work.

I’m hoping the wall thickness and infill will be enough that I can work out some dowels to mount them to the legs with.  A nice tight fit should be enough to keep them from falling off.  I might put a single screw in each one so that someone can’t accidentally pull them off.  I might just glue them and go for full attachment as well.  I’ll get some advice from other builders about that before I make a final decision.

At a minimum, I’ll need to sand the booster cover parts where they’ll join so that I can hide the gap under primer/glazing-putty/paint.

I did some more finishing work on the legs so that I could put the bracelets on.  This meant filing down the radius at the top of the ankle to make it square instead of rounded.

I’ve also started taking panels out of the skins, mostly panels that are “trash”.  I’ve got utility arm slot “covers” all over the place, and “V3” octagons on my desk at work as well.

When I took the skins back off the frame, I was a little worried to see that the screws I put in caused the frame uprights to expand.  I thought I’d drilled enough to avoid that, but apparently not.  This might mean I need to take the screws back out in the long run.  Once I get some body details, I’ll see if those bulges get in the way.

Weekend Progress – Legs, Skins

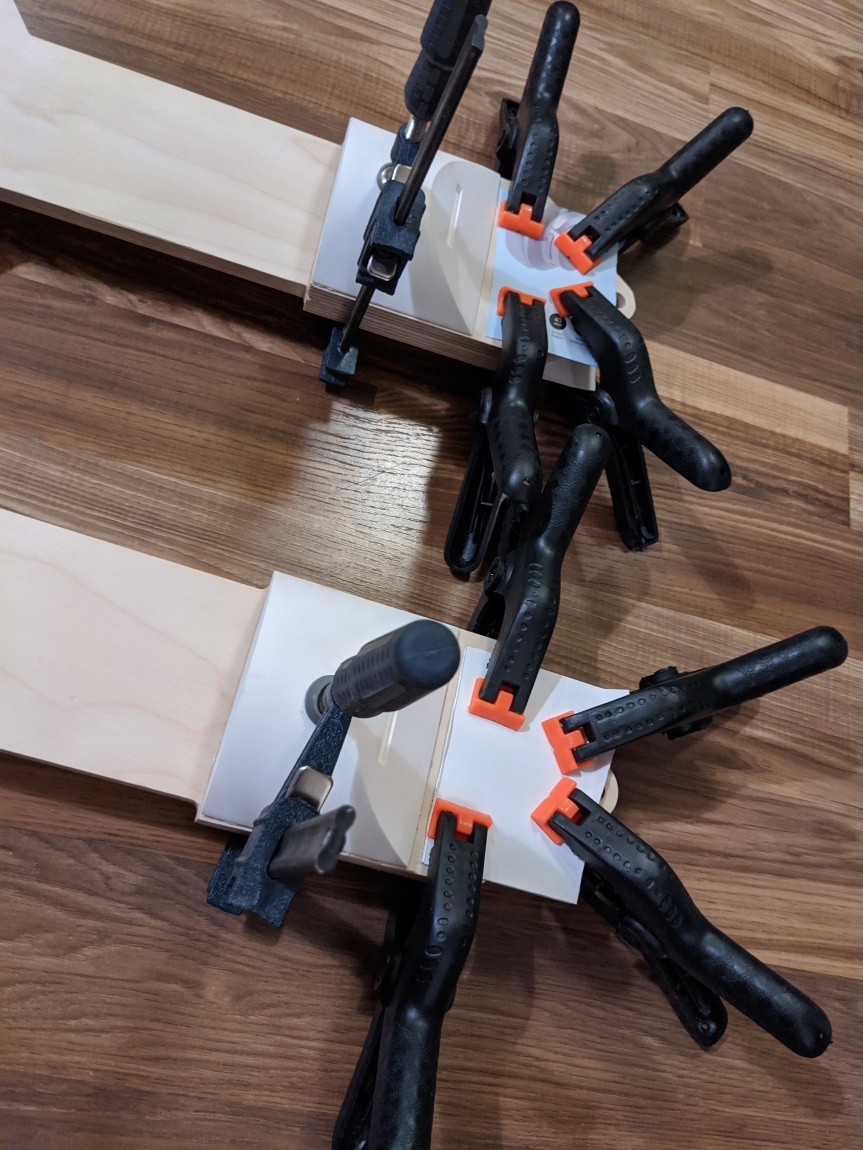
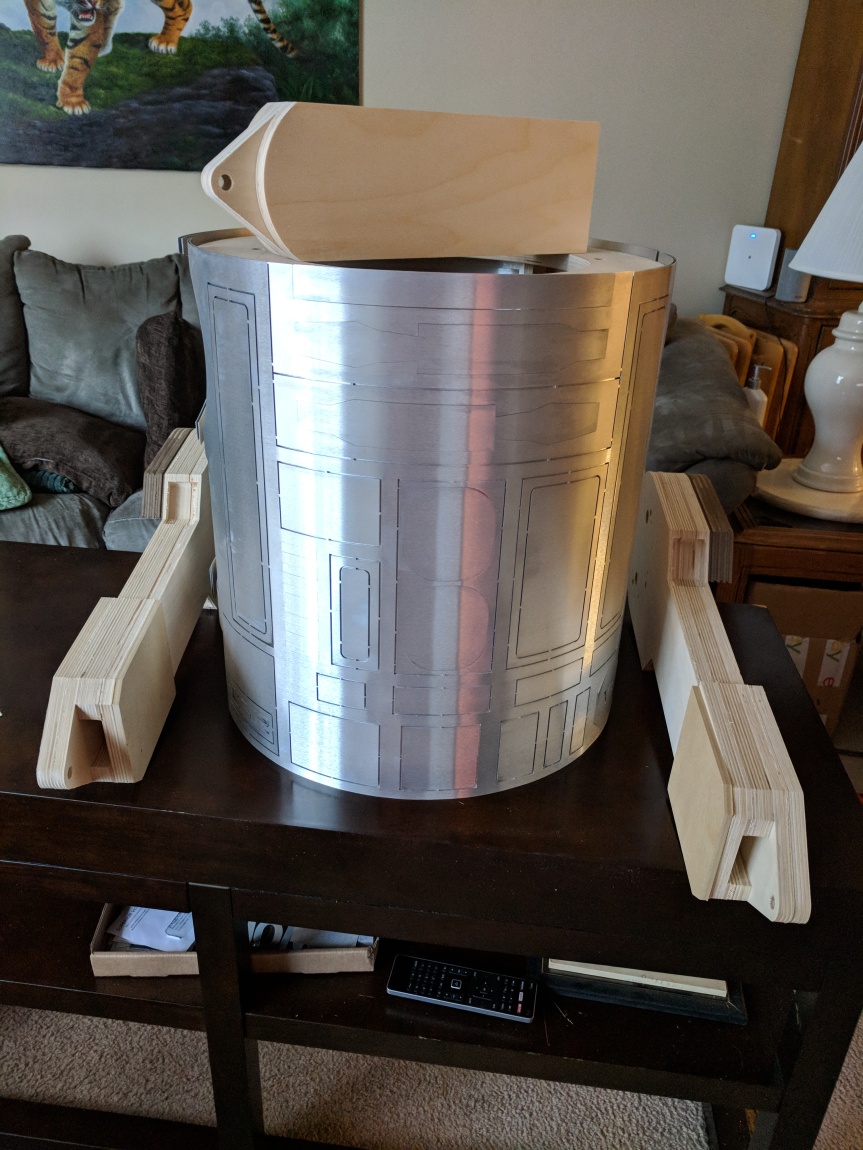
Productive weekend for Artoo building.  I got the horseshoes all glued up and ready to start finishing work on them, and got the frame adjusted so that the skins fit without having to yank them around a whole lot, or needing to put straps on to get the seams to close up nicely.

Gluing up the horseshoes was just a matter of roughing up each piece, smearing some glue around on it, and then sandwiching it on top of what was already glued.  I used one of my leg pieces, with extra dowels sticking through it to line the pieces up on, and clamped everything down to make sure I got a nice snug bond on each one.  I didn’t rush through it, in fact I was able to watch Dr Strange, Limitless, and a few episodes of Grey’s Anatomy while getting the gluing done.

I also filed the inside of the openings in the horseshoes to make them square as they’re supposed to be.  They’re not perfectly square, but the front edge is square enough to make it look like they’re square all the way back.  Next step for the horseshoes is Bondo, which will be a whole new learning2018-05-14 07.37.05 experience for me.

To get the frame in a good way, I took the same file I was using for the horseshoes, and filed out some of the rounded joints that needed it, so that those uprights would sit flush at top and bottom.  Using some extra 1/2″ dowel, I cut some pieces to fill holes in the top and bottom plates, into the side plates to keep things from wanting to shift.  Once I had everything fitting correctly, and made double sure I had the right pieces in the right places, in the right orientation, I put the skins back on, lined everything up, taped them down with the seams perfectly butted, and then put 2″ deck screws into the uprights at the top and bottom.  I pre-drilled the holes to keep things from splitting.  I haven’t put any glue on yet.  I’m trying to figure out how to glue him up with the skin on, but I’ll probably have to take it off, and then glue things up.  To get things glued correctly before the glue starts to dry, I might need a second set of hands to help with that.

On top of the Artoo building this weekend, I also managed to sew the liner into my 14th century (ish) kettle helm, and re-sew a lot of buttons on stuff that needed it.  And if that all wasn’t enough, I read through a few chapters in “Robot Builder’s Bonanza”.

The next step is getting the leg-to-body hubs attached to the inner leg, as well as having the gas pipe flanges attached.  I don’t have access to a drill press right now (I’m really looking forward to having a workshop again.), so I’m planning on taking the hardware and parts to work with me and asking a coworker who has a drill press at home, to drill the holes I need.  Booster covers should arrive by the end of the week, so I should be able to get the legs all glued up relatively soon.
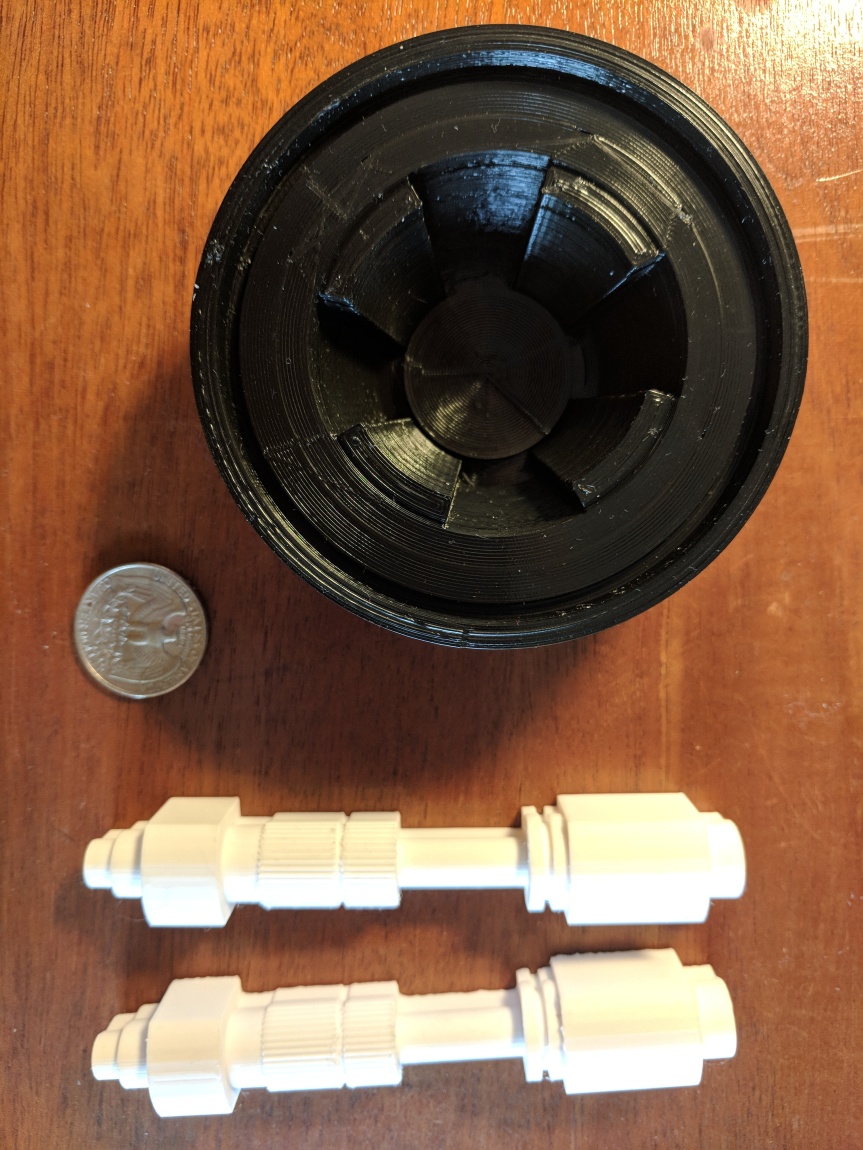
Utility Booster Horses ?!?!?

2018-05-10 21.47.30.jpgToday was a good day for Artoo.  First, I got an email that the Utility Arms had been delivered.  They took much longer to get here than I had expected.  It took 6 days in the mail for them to get from Tennessee to North Carolina.  I’m wondering if they walked them the whole way.  I got an extra gripper/arm piece that was apparently misprinted (too long), and they surprisingly came in blue; I had ordered white or black because its cheaper.  They’ll need some sanding before getting painted, and I’ll need to glue them together.  Next I need to order the Utility Arm Backplates.

Then I ordered Booster Covers from 3DHubs as well.  I do have someone at work who’s looking into getting a 3D Printer and is willing to help by printing

2018-05-10 21.47.46.jpg
Horseshoe pieces with cut outs will get glued up, then the cutouts will get squared off, and then the last 2 pieces attached.  Then I’ll start priming and sanding the horseshoes as a whole before they get attached

parts for Artoo, but I’ve gotta hold off on finishing the legs until I have booster covers in hand, and I’m not feeling that patient.  I ordered the booster covers from 3DHubs, and got a great price by getting them printed at 200 microns.

Lastly, I started gluing up my horseshoes, and my beefy ankles for the outer legs.  I’m “cheating” and using dowels placed in one of the leg pieces to assemble the horseshoe on to keep things lined up.  I had to add some screws to the beefy ankles to keep them more stable, as I didn’t feel that glue (I’m using E6000) was enough.  I need to get another box of 1.5″ deck screws.

I also did a good bit of reading this morning on a few topics, from batteries, wiring, and power, to gluing up a frame in stages instead of all at once.  This weekend I intend to get the frame straightened out so that I can start thinking about gluing it up as well.  I plan to have the horseshoes glued up and started with finishing work, by the end of the weekend.

And I’ve got sewing (buttons and a helmet liner) I’ve been putting off that I need to do.  Not at all related to Artoo building, but its on my to-do list for the weekend.

Skins Arrived!!!

I don’t get to spend much time home this afternoon before running back out, but I did pick up my Artoo skins from the complex office (all package deliveries go there; kind of a nice benefit).

I love that the box is actually branded “RebelScum.com”.  Every part I’ve ordered so far has come in a re-used box (I have nothing against recycling) and covered with eBay tape (despite the fact that no parts have been bought on eBay).  I don’t particularly want to pay for packaging, but I also know that these come with special insert in the box to keep everything in the correct shape and undamaged.  The branding on the outside just served as a point of excitement.

I will get these set up around my frame and get a picture up soon.  OK.  I’m too excited.  I’m going to do it right now.  2018-05-08 17.03.20

Legs – Dry Run

2018-05-07 22.18.18
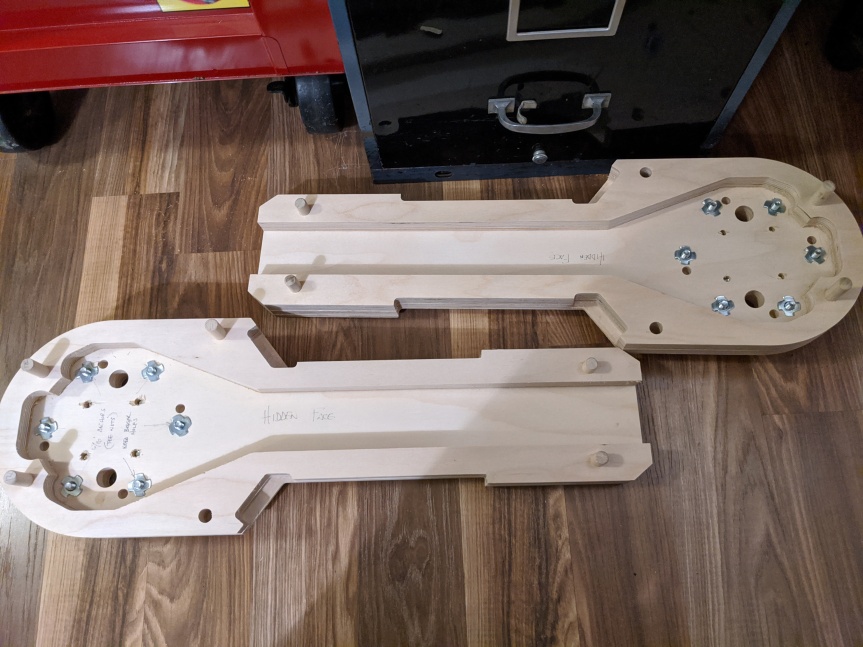
Cut the dowels up and did a bit of sanding.  Got the legs dry fit together.  I need to get some of the leg details and try to get them attached so that there’s less surprises in the long run.  It’s mostly the booster covers that I need to add next.  I hope this doesn’t constantly keep coming up that I need other parts to finish parts that I have.  I really don’t want to buy ALL the parts before I get the first part finished.

I’m glad I did this.  The legs were a bit intimidating.  There’s going to be a significant amount of finishing work to do on them to get them from wood-looking legs, to metal-looking, and with all of the details attached, but now I’m sure I’ve got absolutely all of the “leg” parts (sans details).

Again, thanks to Matt for the instructions and advise.  I’m still very excited to see this coming together.  It’s taking shape much faster than I had anticipated.

Robot Builder’s Bonanza 4th Edition

RBB-10895-4thedAs I mentioned in an earlier post, I picked up a copy of the Robot Builder’s Bonanza.  I went ahead and picked up a newer version (4th edition) along with a copy of Arduino Robot Bonanza.  I’ve been reading through Robot Builder’s Bonanza, and it’s getting me even more excited for this project.  I’m more and more sure that I’ll be building some other robots along the way.  The blue and grey guy on the cover (and throughout the book) strikes me as an ideal look for my other robot.  It’ll have more functionality than Artoo in some ways, because hands and arms, but he’ll also be able to teach me some tricks about autonomy and programming as I go.  I’m thinking somewhere between him and Johnny-5.Johnny_5_from_Short_Circuit

I’ve also been thinking it would be pretty cool to build a t-shirt launcher that Artoo will be able to use when he’s done.  It would be very cool to go to a Durham Bulls baseball game, and see R2-D2 shooting t-shirts into the crowd on Star Wars day.

It’s worth noting that a 5th edition of the Robot Builder’s Bonanza is scheduled for release later this year.  Not sure if I’ll pick up a copy or not; it’ll depend if I’ve gotten all the way through the current edition I suppose.  (Who am I kidding.  It’s almost certain I will.  This is looking like too much fun.)

And one last thing, here’s a link to Robotoid.com, the web “home” of the “Builder’s Bonanza” series.

Skins Ordered

Outer-Skin

Yesterday I wanted to order my skins for Artoo.  I went to the site of a recommended club member who sells 2-layer aluminum skins and to my disappointment, he was out of stock.  I left a message for him, asking when they’d be back in stock.  He replied earlier today, “they’re in stock again now”.  I had my set ordered minutes later.  Hopefully they’ll arrive in the next week and R2 can start looking like something more recognizable.

Oh, and “May the 4th be with you.”

Frame and Legs Arrive

2018-04-23 18.44.33
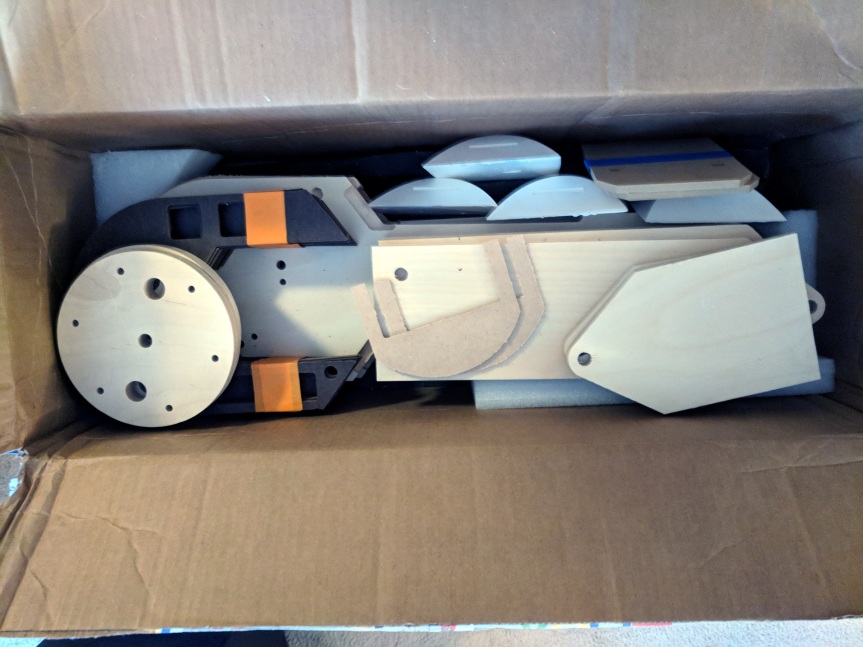
Legs and frame arrived yesterday.  I’m so excited to get started on this project.  I wish I could order the skins and utility arms tomorrow so I could start really putting things together (I need these to be sure all appropriate holes are drilled in the correct places, and that everything fits correctly).

I pulled everything out of the leg box to see what was there.  I’m sure there’s a couple parts (ankle bracelets come to mind immediately) that’ll get swapped for aluminum parts eventually, but otherwise, these look good.  The “beefy ankles” will need some sanding to get some flash off, and to make sure they’re good and clean on the back side.  I really wanted to get the frame pulled out as well, so I put the leg box aside and opened the frame box.

The frame needs a little sanding, and as mentioned above, there’s some “fit” issues with a couple uprights.  I need to double check.  I might have 2 uprights swapped, but I don’t think that’s really possible.  It seems that each upright is different.  I did get it all put together, so I know all the parts are here.  Once I get it skin-fit, screwed, and glued, it’ll get painted flat dark grey or dark blue so it doesn’t show through gaps, or when panels are open.  That’ll also seal it from absorbing moisture easily and should keep it “stable”.  It’s kind of a shame to paint such nice birch.  I may just find some dark stain and go with that and put some polycrylic over that.

The frame and legs came from Matt Henricks, who did the drawings from them, based on designs by Mike Senna.